
For many companies, trade shows are their Super Bowl of face-to-face marketing. Everything is on the line and attracting attention with a spectacular exhibit is the ultimate challenge. Trade shows are competitions… and only the best exhibition designs win.
So how can you compete? Obviously, a big budget and huge exhibit space help, but exhibition design doesn’t begin and end with money, mass, or even beauty. Knowing who you are, who your customers are, and what you’re trying to achieve will always give you an advantage. All too often, exhibitors simply show up and expect magic, but that’s rare in today’s trade show environment. Award-winning exhibition design begins and ends with creating a valuable and memorable experience for attendees that goes well beyond a large hanging sign or colorful graphics.
Why Exhibition Design Matters for Brand Success
Yes, design matters. Whether it’s the UI on your website or how customers use your product. You know that. The same is true for exhibition design. For your brand to be successful at a trade show, you have to attract and engage attendees. A poorly designed booth will do the opposite. Sometimes it’s as simple as fixing poor messaging. Other times, it’s more complicated and requires rethinking your trade show strategy.
Here’s some tough love: Any exhibitor who participates in a trade show simply because their competitors have a booth or because they’ve always had a presence at the show should consider not attending. They’re “there” for all the wrong reasons, and they’re not investing their valuable marketing dollars wisely.
Savvy exhibitors start with a strategy, then engage design to achieve their goals. You don’t need to over-complicate it, but you do need to start with Step 1 before moving to Step 2.
Exhibition Design: More Than Just Aesthetics
Let’s start with the obvious. Exhibit designers are not mind-readers. Nor are they experts about your company, your industry, or your competitors. You’re their source for that information. In other words, they know custom exhibit design and exhibition trends, which they’ll gladly transform into a spectacular display based on what you share with them. The more you share, the better the ultimate design. It’s that simple.
In the next section, you’ll be asked to answer some questions. These questions will be the first steps in both narrowing the scope of the project and expanding the design opportunities. For example, the size of the booth, your past trade show experience, your marketing objectives, and your budget. BTW… while increasing sales is a worthwhile objective, it’s not a particularly helpful one to a designer.
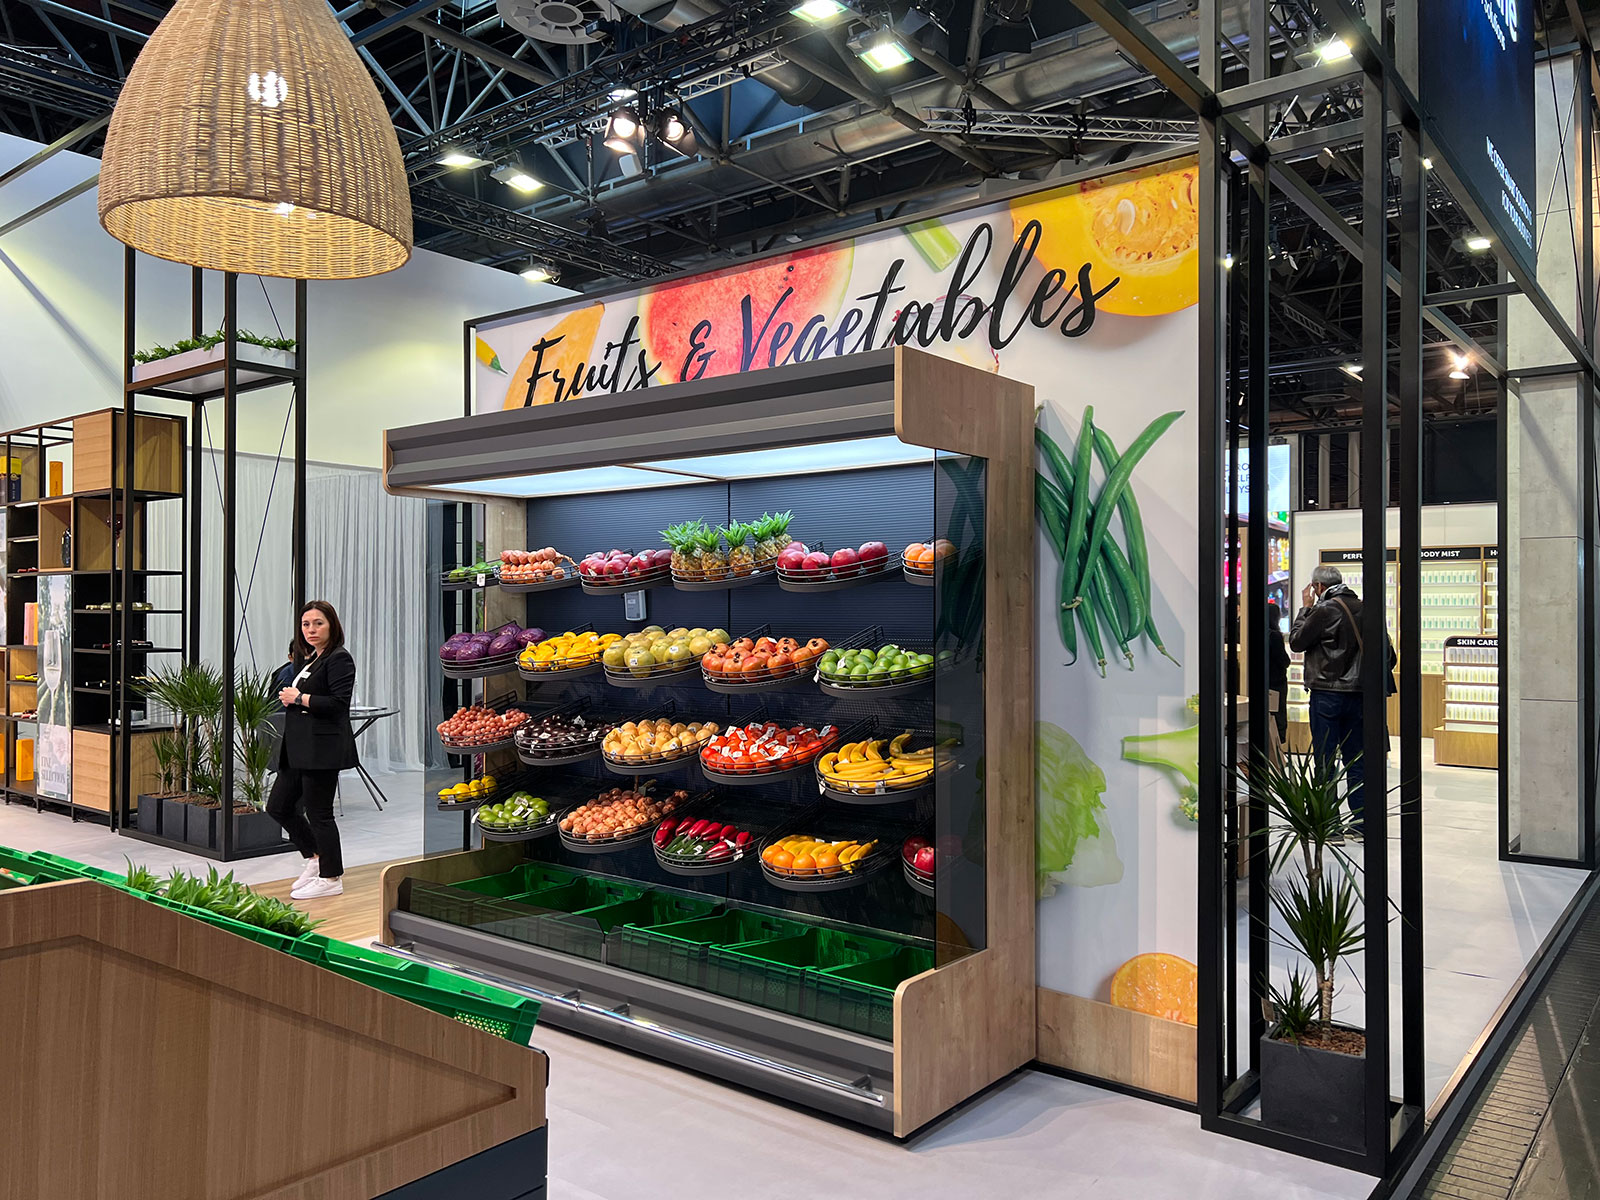
Think of a trade show exhibit as a set of tools. Each tool has a specific purpose. In an exhibit booth, those tools may include meeting rooms, demonstration stations, video monitors or LED tiles, storage, large backlit graphics, furniture, and hanging signs. An exhibit designer then places, transforms, and in some cases, invents new tools to optimize the exhibitor’s success on the trade show floor.
Their knowledge and talent combined with your information and goals is more often than not remarkably spectacular. Mind blowing actually. But it all comes down to sharing, specifics, and intent.
A quick word of advice, if at any point you tell an exhibit designer, “I’ll know it when I see it!” then it’s time to restart the conversation and discovery process over. The “I’ll know it when I see it” approach is a colossal waste of both time and money.
Key Elements of High-Converting Exhibition Design
Creating a high-converting exhibition booth requires a strategy. It is about reducing friction between a wandering trade show attendee and your sales team.
Here are Four Key Elements to Consider:
- Curiosity and Communication. Attendees decide whether to stop or keep walking in roughly three seconds. Your design must communicate three things instantly from the aisle:
- The “Who”: Clear branding at the highest point (long-range visibility).
- The “What”: A concise value proposition at eye level (mid-range).
- The “Why”: A specific solution or product benefit (short-range).
- Smart Floor Planning. The physical layout should act as a funnel, guiding visitors from the “public” aisle to “private” one-on-one areas.
- Open Entry Points: Avoid blocking the entrance with large counters. An open floor plan feels more inviting and less like a “trap.”
- The Rule of Right: Most people naturally turn right when entering a space. Place your flagship product or most engaging demo on the right side of the booth.
- Zoning: Clearly define areas for greeting, product demonstration, and deep-dive negotiations.
- Multi-Sensory Engagement. Static displays are easy to ignore. To convert, you need to engage more than just sight.
- Tactile Demos: If possible, let people touch the product. If your product is digital, use oversized touchscreens or haptic feedback devices.
- Soundscapes: Use directional speakers (sound showers) so audio is only heard by those standing directly in front of a screen, preventing “noise bleed” into the aisle.
- The “Lure”: Scent or motion (like a kinetic sculpture or moving digital content) can trigger a subconscious “stop” response in the brain.
- Dynamic Lighting and Contrast. Lighting is often the most undervalued tool in exhibit design. It directs the eye and sets the emotional tone.
- Accent Lighting: Use spotlights to create “hero” products. If everything is bright, nothing is important.
- Backlit Graphics: Tension fabric displays with internal LED lighting (lightboxes) significantly increase readability and modern appeal compared to front-lit panels.
- Color Temperature: Use warmer tones for lounge areas to encourage staying longer, and cooler, crisp white lights for product displays to imply precision and cleanliness.
Ultimately, success is measured by how effectively the space reduces the social and physical barriers to entry, making it easy for the right prospects to engage and the wrong ones to move on.
What is Exhibition Design? 15 Essential Design Questions
The best exhibition designs make an emotional connection with attendees. Creating that ideal design takes time and effort, but it should be fun as well. Let’s start by answering these 15 Essential Exhibition Design Questions.
- Does your company have branding guidelines/logo or graphic files/website address? Can you share these files?
- What size is the exhibit? Do you plan to reconfigure the exhibit for other shows? If so, what sizes? Knowing this will guide both the design and the choice of materials.
- What is the budget? This is essential. Still undecided about an exact budget? The next best option is a workable budget range. No exhibitor wants to be surprised by a beautiful booth outside their budget or underwhelmed by a booth designed for a lower budget.
- Do you want to purchase or rent? Or a combination of both? This assists the designer in choosing materials and designing to a specific budget.
- What physical properties does the exhibit need to have? For example, workstations, counters, slatwall, semi-private or private conference areas, monitors, storage, etc.? This information allows the designer to create a functional trade show design.
- What type of display have you used in the past? Are you looking for something similar or different? What did you like or not like about the previous booth?
- Are there any materials or construction methods you prefer? Or dislike? Many experienced exhibitors have a strong attraction or aversion to specific materials.
- Are there any unusual dimensional restrictions? Can you provide show regulations? Some shows have unusual restrictions for the height of the booth or setbacks from the aisle.
- Do you show product(s)? What are the dimensions and specifications? How do you prefer to show the products? Display cases, countertops, shelves, hooks, etc.?
- Does the display need to be portable or modular? Does it need to ship via FedEx or UPS or are you OK with packing in custom crates? This will guide our use of materials.
- Who will assemble the display: show labor or your own team? We have great solutions for both scenarios.
- Do you have any images of design elements you like? Even if these “inspiration images” are not trade show related, they are very helpful. For example, architectural elements, finishes, colors, natural elements, retail environments, etc.
- Are there any descriptive words you use to describe your company? What do you want visitors to your booth to “feel” about your company? From “opulent” to “bad-ass,” we have heard some interesting descriptors, and this gives the designer the insight to craft a personalized, experiential space.
- Design Due Date? Typically, designs are completed within a few business days. However, every project and every client has their own timeline. We do our best to accommodate requested timelines.
- Show Opening Date? So very important! Creating the design and then building it depends on the timeframe. Designers can make material selections which will go a long way toward meeting a three-week vs. a three-month window.
How to Plan Your Exhibition Design Step-by-Step
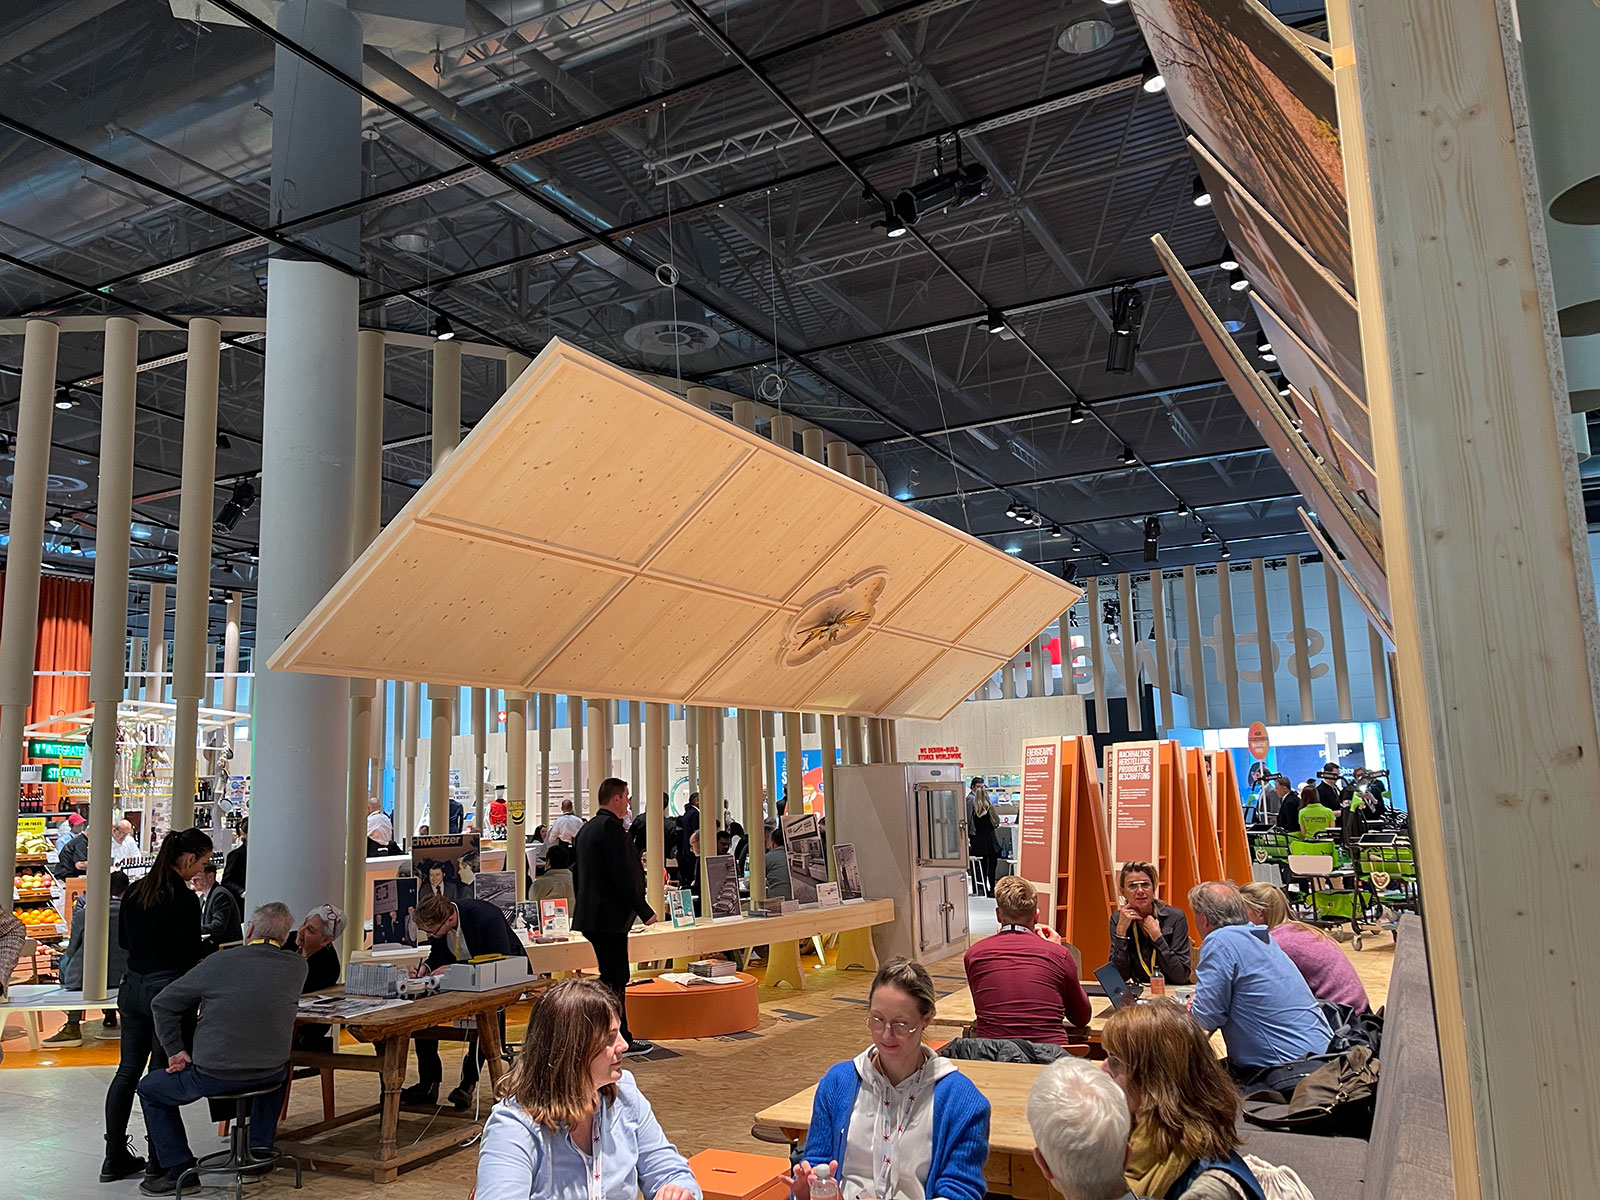
Most exhibitors enjoy the exhibition design process. And they should. It’s one of the few opportunities they have to create a 3D structure that amplifies the company’s marketing. Let’s start the process by breaking it down into four phases: Concept, Design, Technical, and Logistics.
| Phase | Focus | Key Output |
| Concept | Strategy | Creative brief & Budget |
| Design | Layout | 3D Renders & Floor plan |
| Technical | Details | Electrical & Graphic files |
| Execution | Logistics | Shipping & Install schedule |
Now let’s move from broad goals to a step-by-step guide.
Step 1. Define Your Primary Objectives. What are your goals for the event? And how do you define success? Determine your KPIs, your target audience, and how to maximize success.
Step 2. Review Your Floor Plan and Orientation in the Show Hall. Identify the primary “flow” of the aisle. Is your booth near an entrance, a food court, or a major competitor? Position your “hero” elements to face the direction of the heaviest foot traffic.
Step 3. Choose a Structure that Aligns with Your Budget (and Usage). Your exhibit designer can guide you on this decision. Does your vision require a custom exhibit or a modular structure? Or would a rental make more sense?
Step 4. Add the Visual and Sensory Details. Think in terms of levels. High-Level Branding, like towers or hanging signs. Mid-Level Branding, like wall graphics with your main value proposition. And finally, Low-Level Branding on counters and kiosks with product specs and calls to action.
Step 5. Integrate Any Technology. Any technology in your booth should have a purpose or solve a problem. Incorporate touchscreens or AR/VR stations that allow users to explore products that are too large to bring to the show floor. Designate a specific, discrete area for lead-retrieval tablets so staff can scan badges without creating a “bottleneck” at the entrance.
Step 6. Finalize Show Site Details, Like Electrical, Installation, and Shipping. You would be surprised at how often a trade show campaign fails because no one scheduled labor or ordered flooring or arranged for lead retrieval. Handling the routine tasks in time not only reduces last-minute stress but also avoids excessive expenses.
Exhibition Design Ideas: Innovations and Trends
Every three years, Katina Rigall Zipay, the Creative Director of Classic Exhibits (a sister company of Exhibits NW), attends EuroShop in Germany. This show highlights international exhibit trends. Katina reviews those trends in the video below:
Materials:
- Natural Fibers: Ropes, Baskets,
- Natural Raw Wood
- Greenery
- Mirrors: Reflective and Textured
- Tiles and Bricks
- Corrugated Structures and Accessories
- Wireframes Structures and Framing
Structures:
- Arches or Pill Shape
- Cubes
- Irregular, Organic Curves
- Abstract Trees
- Circles and Cylinders
- Accordion Shapes
- Slats
- Mobile Phone Shape (Arches)
Colors and Patterns:
- Printed Greenery
- Black, White, and Natural Woods
- Spot Bright Colors
- Color Blocking | Color Rainbows
- Segmented Shapes
- Art Deco
- Sketches: Cartoon, Ink Drawings, Doodles
Lighting:
- LED Bulbs
- Edge Lighting
- Rope Lights
- Programmable RGB
- LED Hanging Lights in Clusters
- Basket Lights
Interactives:
- Buttons, Cranks, Tunnels
- LED Video Walls Including Animation
- Transparent Video Screens
- Swings
Other:
- Mannequins
- Cathedral Shapes
- Sculptures
Exhibit Fabrication: Bringing Designs to Life
Unlike cars, potato chips, or shoes, most exhibits are designed and built to the specific requirements of the client. There are exceptions, like basic portable displays, but even those are frequently customized and the graphics are personalized to fulfill the exhibitor’s trade show goals.
At Exhibits Northwest, every exhibit project starts with one or more intake meetings where the client shares details about the show, their budget, and most importantly, their marketing vision and objectives. From there, the exhibit designer will create renderings based on the discovery meetings. Within a week or two, the designer will present the renderings. At this point, there will either be revisions or Exhibits Northwest will identify the timeline, specify the materials, creatr graphic templates for the graphic designer, detail the build, and finally, construct the exhibit.
Building an exhibit is unlike building any other structure, primarily because it has to be assembled to be deconstructed, packed in crates, and shipped securely. For a detailed explanation of the exhibit fabrication process, see the article Trade Show Exhibit Fabrication: From Concept to Completionin the Exhibit Northwest Trade Show Tips blog**.**
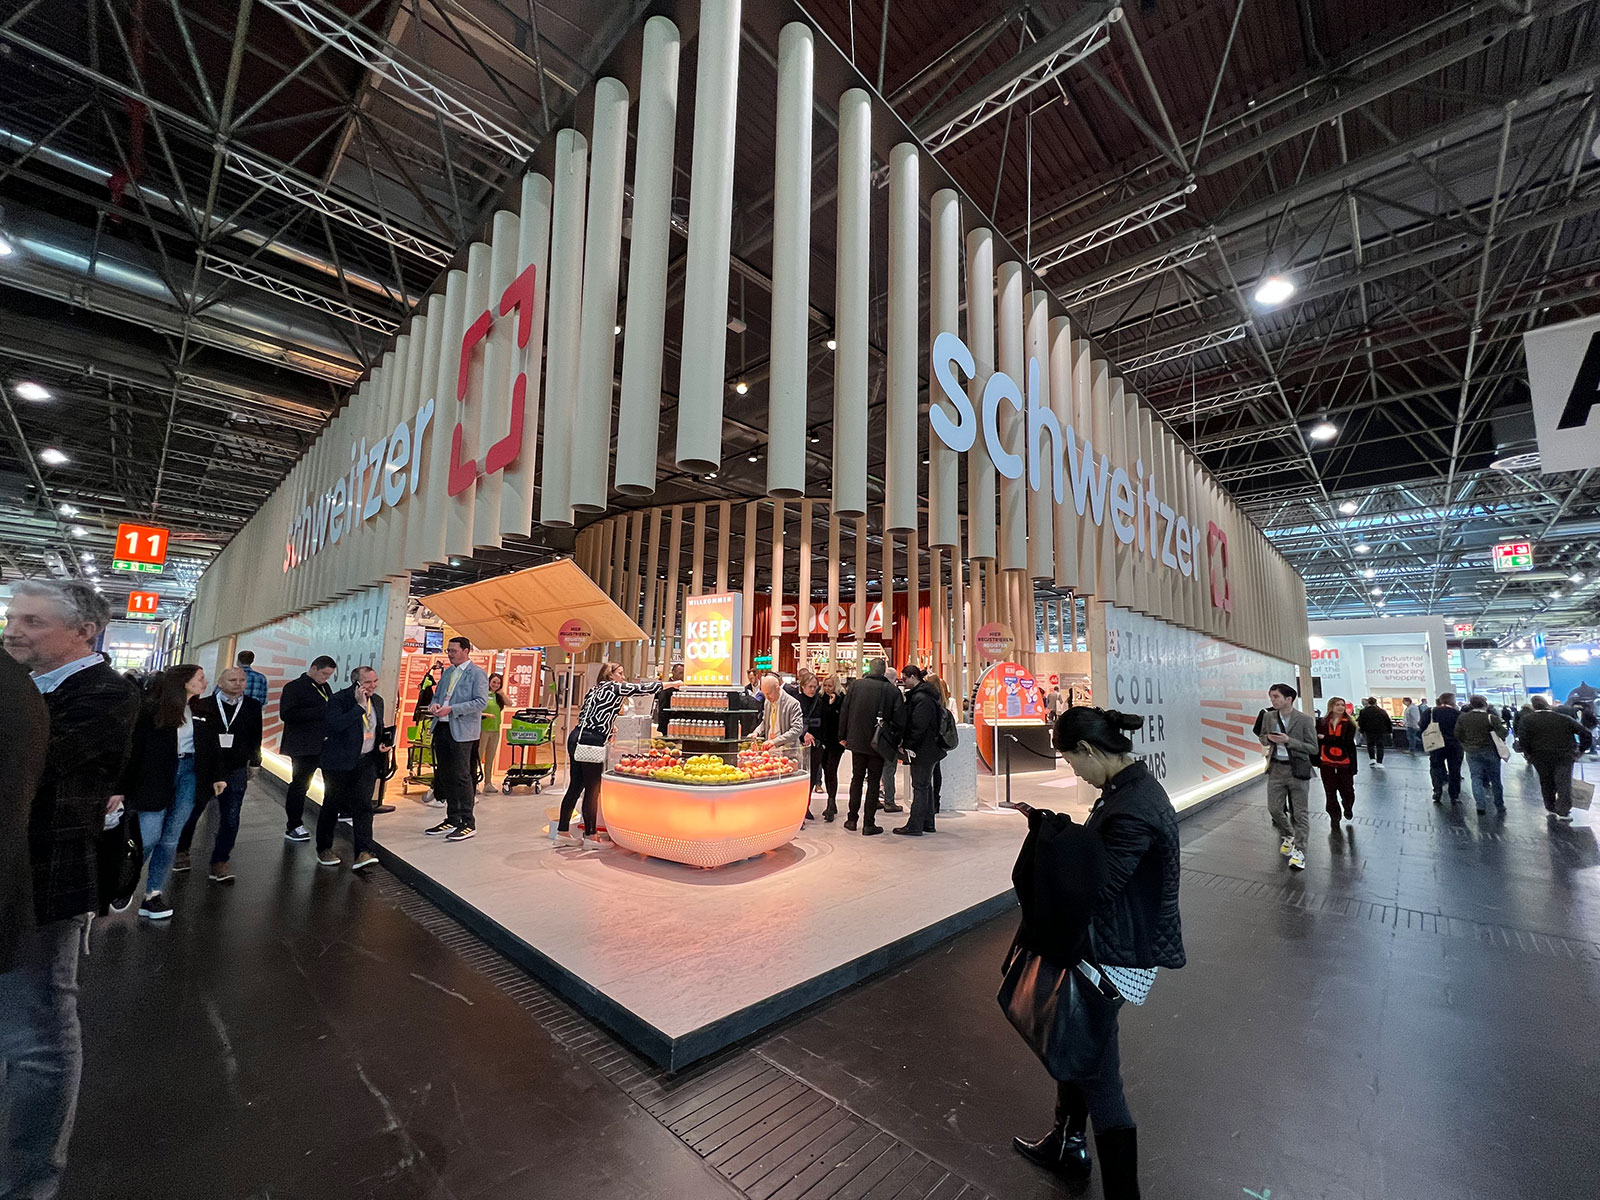
Custom vs Rental Booths: Which One is Right for You?
| Factor | Custom Exhibition Booth | Rental Exhibition Booth |
|---|---|---|
| Cost | Higher upfront cost but long-term value for frequent exhibitors | Lower initial cost, ideal for short-term use |
| Branding | Fully customized to match your brand identity | Limited customization, but still brandable |
| Flexibility | Highly flexible design tailored to your goals | Less flexible, based on available designs |
| Reusability | Can be reused for multiple events | Usually rented per event |
| Setup & Logistics | May require more planning and coordination | Easier and quicker setup handled by provider |
| Best For | Brands with long-term trade show strategy | First-time exhibitors or budget-conscious businesses |
Exhibit Layout: Maximizing Space and Impact
Trade shows are all about making a big impact in a small space, so maximizing your booth’s potential is crucial. Here are some tips to help you achieve that:
Planning and Design:
- Know your goals: What do you want to achieve at the show? Generate leads, showcase products, build brand awareness? Tailor your space accordingly.
- Think in 3D: Don’t just focus on the floor. Utilize walls, hanging displays, and even the ceiling to showcase products and branding.
- Go modular: Choose versatile display systems, like Gravitee Modular Walls, that can be easily reconfigured for different needs.
- Embrace negative space: Don’t crowd your booth. Leave room for attendees to move around and engage with your staff. Renderings and plan views are always an accurate guide of the effective space.
Space-saving Strategies:
- Multifunctional furniture: Counters with lockable storage and charging pads, modular soft seating, and ottomans with built-in storage.
- Monitors, LED video tiles, and tablets: Replace physical brochures and product demos with interactive screens and tablets, saving on-floor space.
- Shelves, slatwall, and hanging displays: Showcase products without taking up valuable floor real estate.
- Transparent walls and partitions: Create separate areas for meetings or presentations without blocking sightlines.
- Mirrors: Make the booth appear larger and reflect light, creating a brighter atmosphere.
Engagement and Experience:
- Interactive elements: Games, quizzes, or VR experiences can draw in attendees and keep them engaged.
- Live demonstrations: Showcase your products or services in action to grab attention and highlight benefits.
- Open and welcoming atmosphere: Make it easy for attendees to approach your booth and staff.
- Storage and logistics: Have a designated area for storing giveaways, brochures, and equipment to avoid clutter.
Additional Tips:
- Choose a strategic location: If possible, opt for a corner or perimeter booth that intersects multiple aisles.
- Lighting: Use strategic accent lighting and backlighting to highlight key elements and create a warm ambiance.
- Sound: Add background music at a low level to block competing sounds and conversations.
- Staff training: Train your booth staff to optimize the space when interacting with potential clients.
Remember, the key is to be creative and strategic with your space. Don’t be afraid to experiment and find what works best for your brand and goals. By following these tips, you can transform your small booth into a powerful attraction that maximizes your trade show impact.
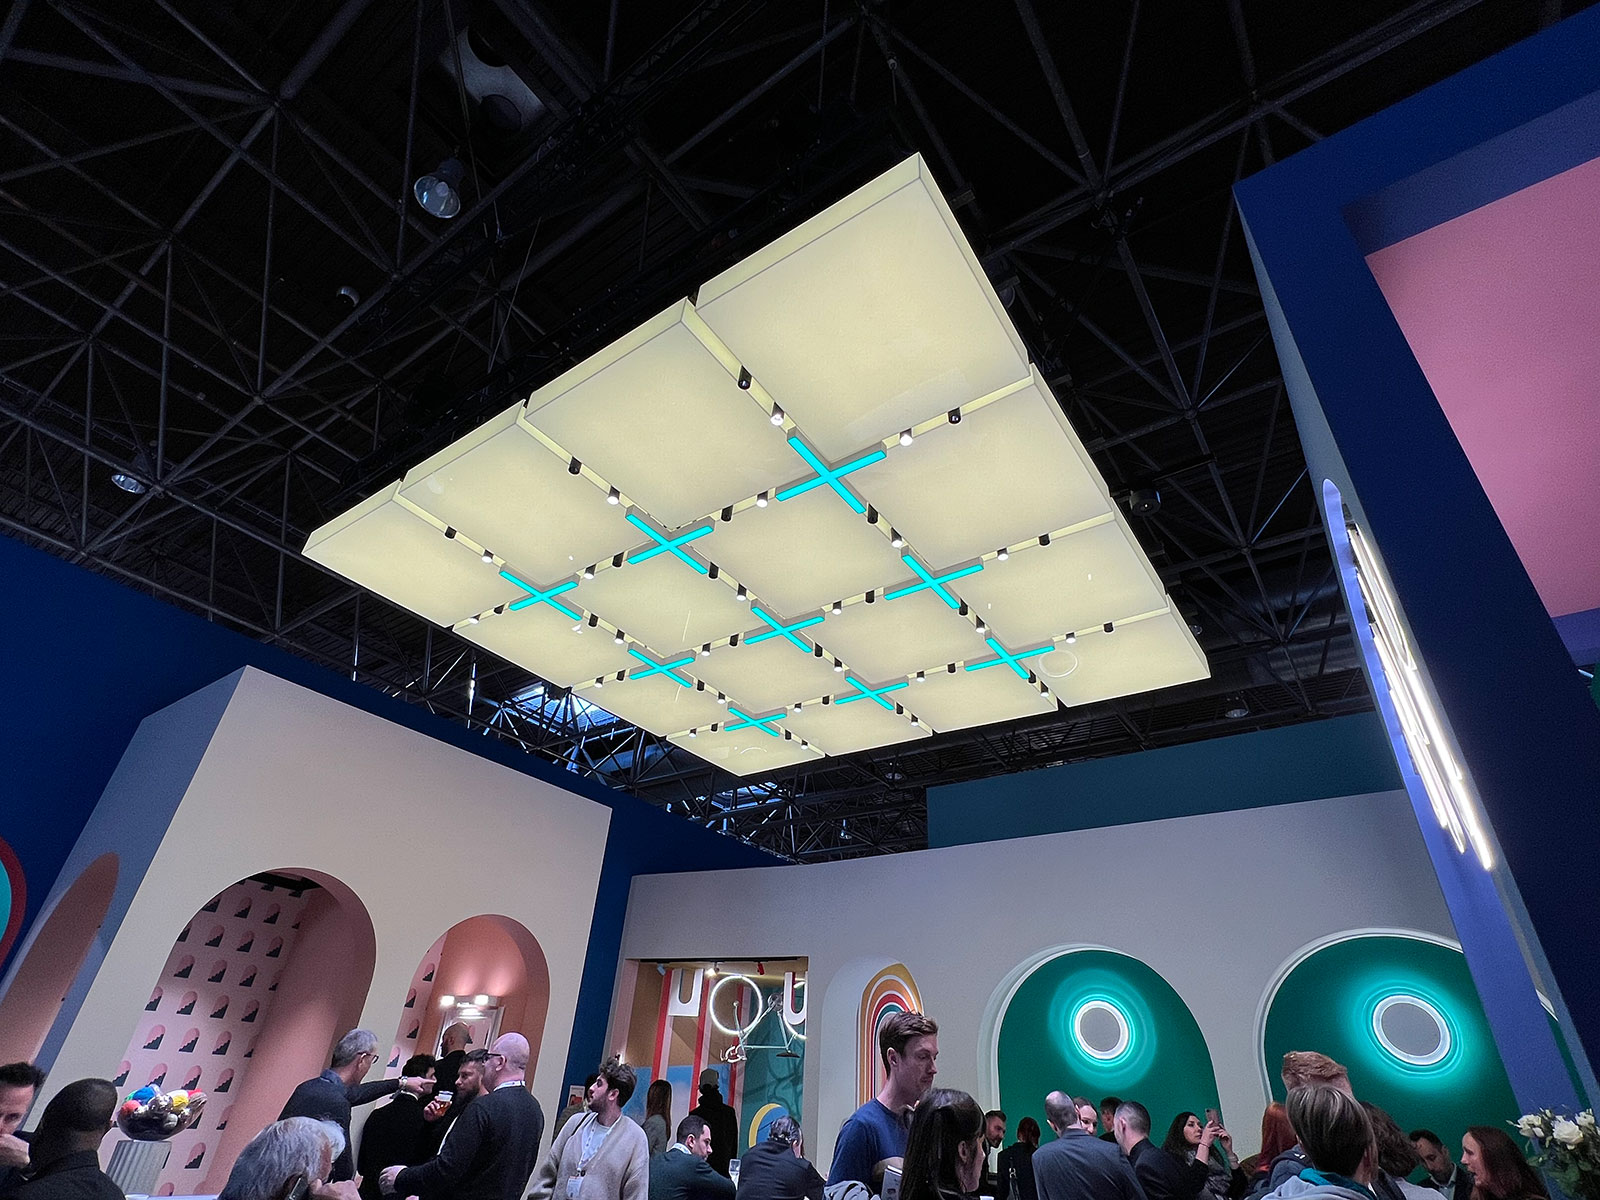
5 Common Exhibition Design Mistakes to Avoid
You’re focusing on the big picture when designing your exhibit, but small tactical errors can sabotage your ROI. Avoiding these common pitfalls ensures your booth remains a high-performing sales tool rather than a costly storage unit.
- The Barrier. One of the most frequent mistakes is placing a long reception counter across the very front of the booth.
- The Mistake: This creates a physical and psychological “wall” that says “Stay out” rather than “Come in.”
- The Fix: Move counters to the sides or use smaller, pod-style kiosks. This allows attendees to step into your space and engage with the environment without feeling like they are being interrogated at a border crossing.
- Text and Graphic Overload. Many exhibitors try to attract attendees by putting too much information on their walls. Your booth is a billboard, not a book.
- The Mistake: Using excessive text, long paragraphs, or placing critical text below waist level (where it will be blocked by furniture or people).
- The Fix: Keep your main message to under 10 words and ensure your primary value proposition is at eye level (roughly 150cm to 170cm from the floor). If an attendee has to stop to read a paragraph, they probably won’t.
- Poor Lighting. Relying solely on the harsh, overhead fluorescent lights of the convention center is a recipe for a flat, uninviting booth.
- The Mistake: Neglecting to bring your own lighting or failing to light the “corners” of the booth.
- The Fix: Use backlit fabric displays to make colors pop and accent lighting to highlight specific products. A well-lit booth naturally draws the eye in a crowded hall, much like a bright storefront on a dark street.
- Messy Clutter. Storage is often an afterthought in design, leading to visible clutter.
- The Mistake: Leaving shipping crates, staff jackets, half-eaten lunches, and extra brochures in plain sight of prospects.
- The Fix: Designate a hidden storage closet within your modular structure. If space is tight, use counters with lockable doors and internal shelving to keep the “business” side of the booth invisible to visitors.
- Technology for Technology’s Sake. Integrating screens or gadgets without a clear purpose can actually distract from your sales goal.
- The Mistake: Having a looping video with no sound or subtitles, or a VR headset that takes too long to put on, creating a “logjam” in the aisle.
- The Fix: Ensure every tech element has a clear purpose for the attendee. If you use a screen, ensure it has large, readable captions so the message is clear even if the audio is muted.
10 Ways to Integrate Technology in Exhibition Design
Technology can be a powerful tool in exhibition design, transforming passive viewing experiences into interactive and immersive ones. Here are 10 ways to integrate technology into your next exhibition:
- Interactive Displays: Touch screens, motion sensors, and other interactive elements can engage visitors and allow them to explore exhibits at their own pace. For example, a science exhibit could have a touch screen that lets visitors control a simulated experiment or an art exhibit could have motion sensors that trigger changes in the artwork as visitors move around.
- Augmented Reality (AR): AR overlays digital information onto the physical world, allowing visitors to see and interact with things that aren’t actually there. For example, a history exhibit could use AR to bring historical figures to life, or a natural history exhibit could use AR to let visitors see the skeletons of animals inside their bodies.
- Virtual Reality (VR): VR immerses visitors in completely virtual environments, allowing them to experience things that would be impossible in the real world. For example, a space exhibit could use VR to let visitors walk on the moon, or a music exhibit could use VR to let visitors experience a concert from the stage.
- Projection Mapping: Projection mapping projects video or images onto physical surfaces, creating stunning and dynamic visuals. For example, a building could be transformed into a giant canvas for a projection mapping show, or an object could be made to appear to come to life with projected animations.
- Holograms: Holograms create the illusion of three-dimensional objects that appear to float in mid-air. This can be a great way to showcase objects that are too delicate or valuable to be displayed in the real world or to create an otherworldly atmosphere.
- Gamification: Incorporating game elements into exhibits can make them more fun and engaging for visitors, especially children. For example, a history exhibit could have a scavenger hunt where visitors use clues to learn about different historical events or a science exhibit could have a game where visitors compete to build the tallest tower out of recycled materials.
- Social Media Integration: Encourage visitors to share their experiences on social media by providing photo opportunities, hashtag campaigns, and interactive social media walls. This can help to spread the word about your exhibition and reach a wider audience.
- Data Visualization: Use data visualization tools to present complex information in a clear and engaging way. This can be a great way to make statistics and other data more meaningful for visitors.
- Personalized Experiences: Use technology to personalize the exhibition experience for each visitor. For example, visitors could wear RFID bracelets that track their movements and preferences, and then use this information to deliver targeted content or recommendations.
- Accessibility: Make sure your technology is accessible to everyone, including people with disabilities. This means using alt text for images, providing transcripts for videos, and offering assistive technologies like headphones and braille keyboards.
Remember, the most important thing is to use technology in a way that enhances the exhibition experience, not detracts from it. Choose technologies that are relevant to your exhibition’s theme and content, and make sure they are easy to use and understand.
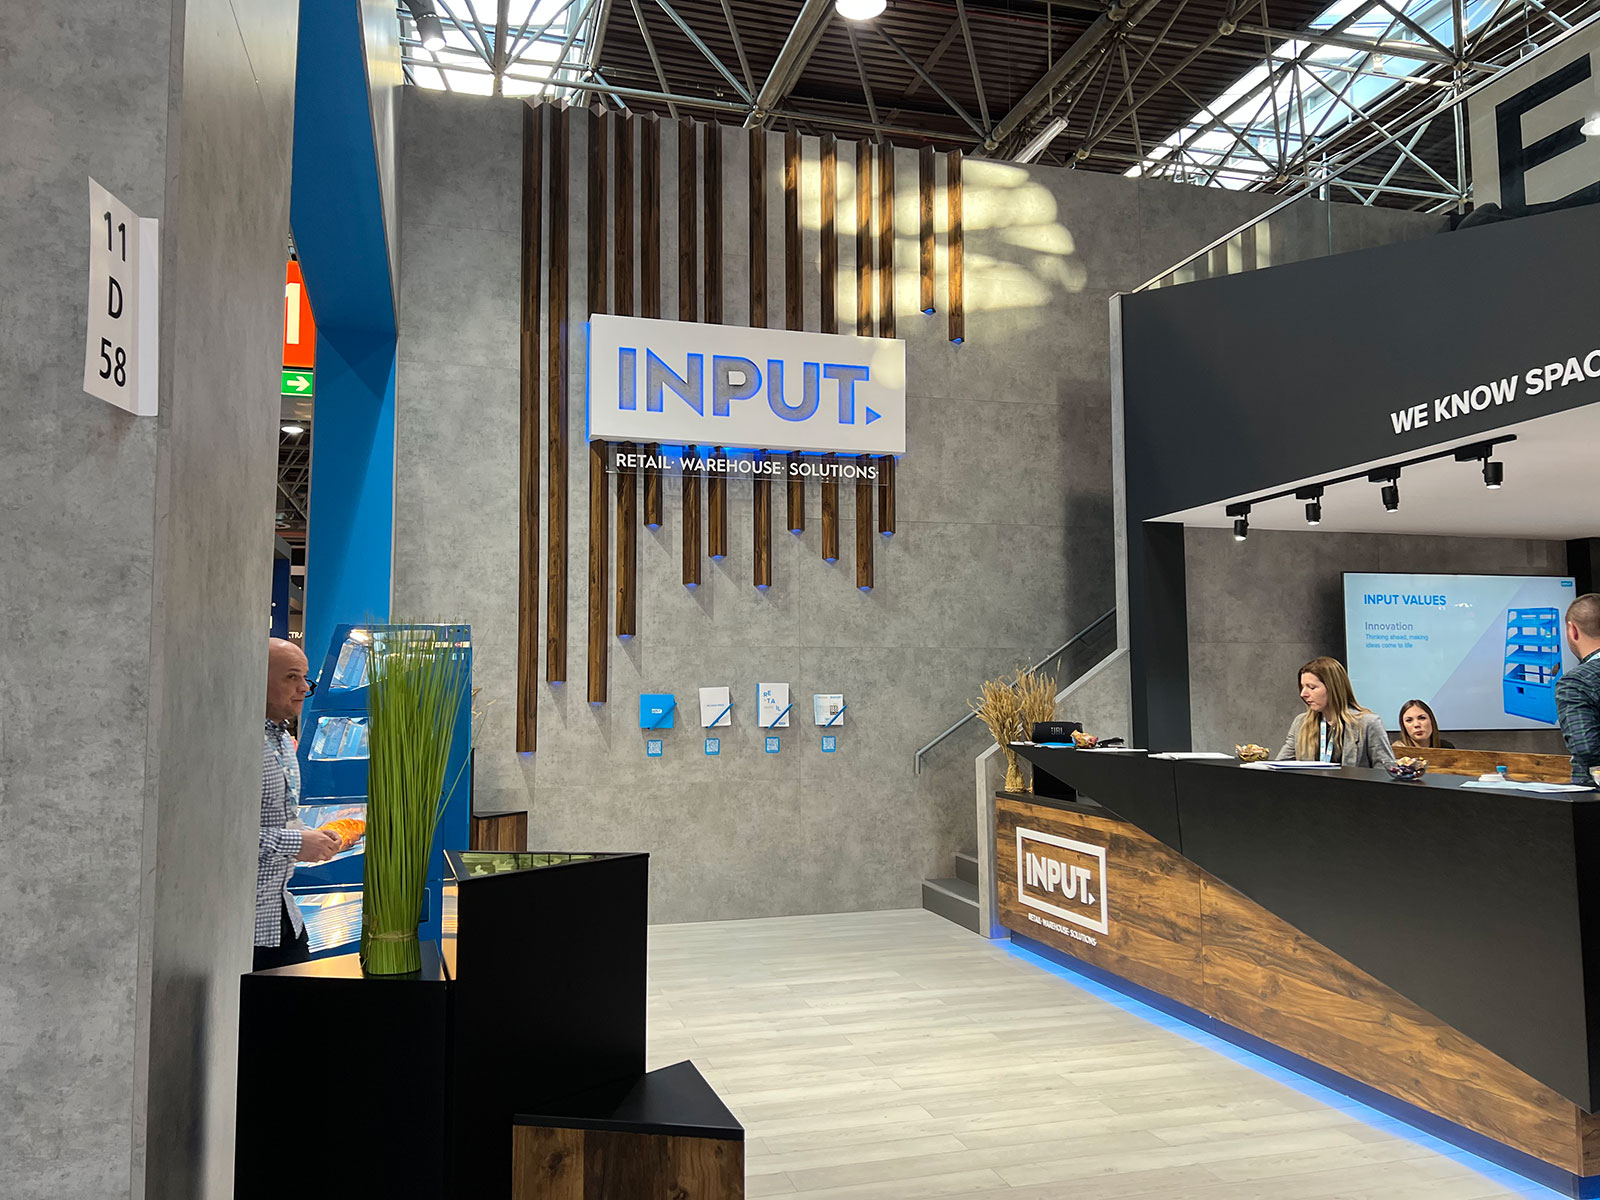
Meet Exhibits Northwest: Your Custom Exhibition Design Partner!
Choosing an exhibition design partner to build your next exhibit is important, especially for a custom inline or island exhibit. It should be a partnership, one that evolves as your company and your marketing changes.
At Exhibits Northwest, we’ve been designing and fabricating exhibits for more than 20 years. More importantly, we’ve been partnering with companies to elevate their trade show marketing campaigns and guiding them through the hidden landmines of trade shows.
We invite you to contact us for an initial intake meeting and design consultation, and then visit our 125,000 sq. ft. fabrication and printing facility in Portland, OR. Furthermore, we encourage you to browse through our custom exhibition design pageto see capabilities and design ideas.